
It is May 2026, and I am staring at a GLB file that did not exist 20 minutes ago. The source? A single image of a desk lamp I snapped with my phone. The tool? Pixal3D, Tencent ARC Lab's latest foray into turning flat images into textured 3D models. I ran it locally after waiting too long in the Hugging Face Space queue. That is a common issue when free demos hit the SIGGRAPH spotlight.
Single-image 3D generation is not new, but most tools have a tell: geometry that looks good until you rotate it, or textures that feel like someone guessed. Pixal3D claims to sidestep these problems with its pixel-aligned pipeline, and I wanted to see if that claim held up. Could it really produce something usable for game engines or 3D printing? Or would it fall into the same traps as its predecessors? Here is what it is like to set up, use, and push this tool to its limits.
How Pixal3D Works
Pixel-Aligned 3D Generation Explained
Pixal3D's approach to generating 3D models stands out because it directly connects pixels to 3D voxels. Unlike methods that depend on indirect cross-attention mechanisms, Pixal3D uses a back-projection conditioning technique to anchor its 3D generation process. This method transforms multi-scale image features into a 3D feature volume, creating a direct link between pixels and 3D geometry.
Here is how it works: for each 3D voxel, the system traces a ray back to the camera, sampling the relevant pixel features. This process enforces a geometric constraint, keeping the generated 3D structure aligned with the visible parts of the input image. By grounding its geometry in this way, Pixal3D minimizes randomness and creates models that stay true to the image's visual details. The next section breaks down the key components of this system.
System Components
Pixal3D's pipeline is organized into five main components, each playing a specific role in the generation process:
| Component | Function |
|---|---|
| DINOv2 | Extracts high-level semantic 2D feature maps from the input image. |
| Sparse SDF VAE | Encodes and decodes 3D geometry into compact, sparse latent representations. |
| Back-Projection Conditioner | Converts DINOv2 outputs and high-res features into a 3D feature volume, which guides the 3D generation process. |
| Sparse DiT (two-stage) | Features a coarse stage for generating the basic shape and a detail stage for refining the geometry. |
| Marching Cubes + PBR Decoder | Produces a final mesh with base color, normal, roughness, and metallic maps. |
This modular setup makes debugging more manageable. For example, if the overall shape looks fine but textures lack detail, you can focus on optimizing the detail stage of the Sparse DiT component.
It is also worth noting that the main branch of Pixal3D (as of May 2026) uses the TRELLIS.2 backbone, while the paper branch relies on Direct3D-S2. This distinction matters if you are trying to replicate the SIGGRAPH 2026 benchmark results.
Input Requirements and Known Limitations
Now that the system itself is covered, here is what it needs to perform well and where it struggles. Pixal3D performs best when working with single images of objects that have clean silhouettes, centered framing, and clearly defined material regions. These conditions allow it to estimate PBR textures (like roughness and metallic maps) with high accuracy. However, certain challenges can impact results:
- Watermarks, heavy shadows, or strong highlights: These can interfere with texture estimation.
Occluded surfaces: Since a single image does not show every side of an object, the model has to guess the geometry of hidden areas. This limitation is especially important for applications like game development or 3D printing, where accuracy on all sides is critical. As the official documentation explains:
"A single image cannot fully prove the back side. The model makes educated guesses. Use multiple views when fidelity on all sides matters for production." (Pixal3D Project Site)
For higher fidelity, Pixal3D supports multi-view input. It combines features from different camera angles into a unified 3D feature volume, improving its ability to reconstruct complex objects. However, transparent materials remain a known weak point, as their light-transmitting properties make PBR texture estimation unreliable.
How to Access and Set Up Pixal3D
Access Options
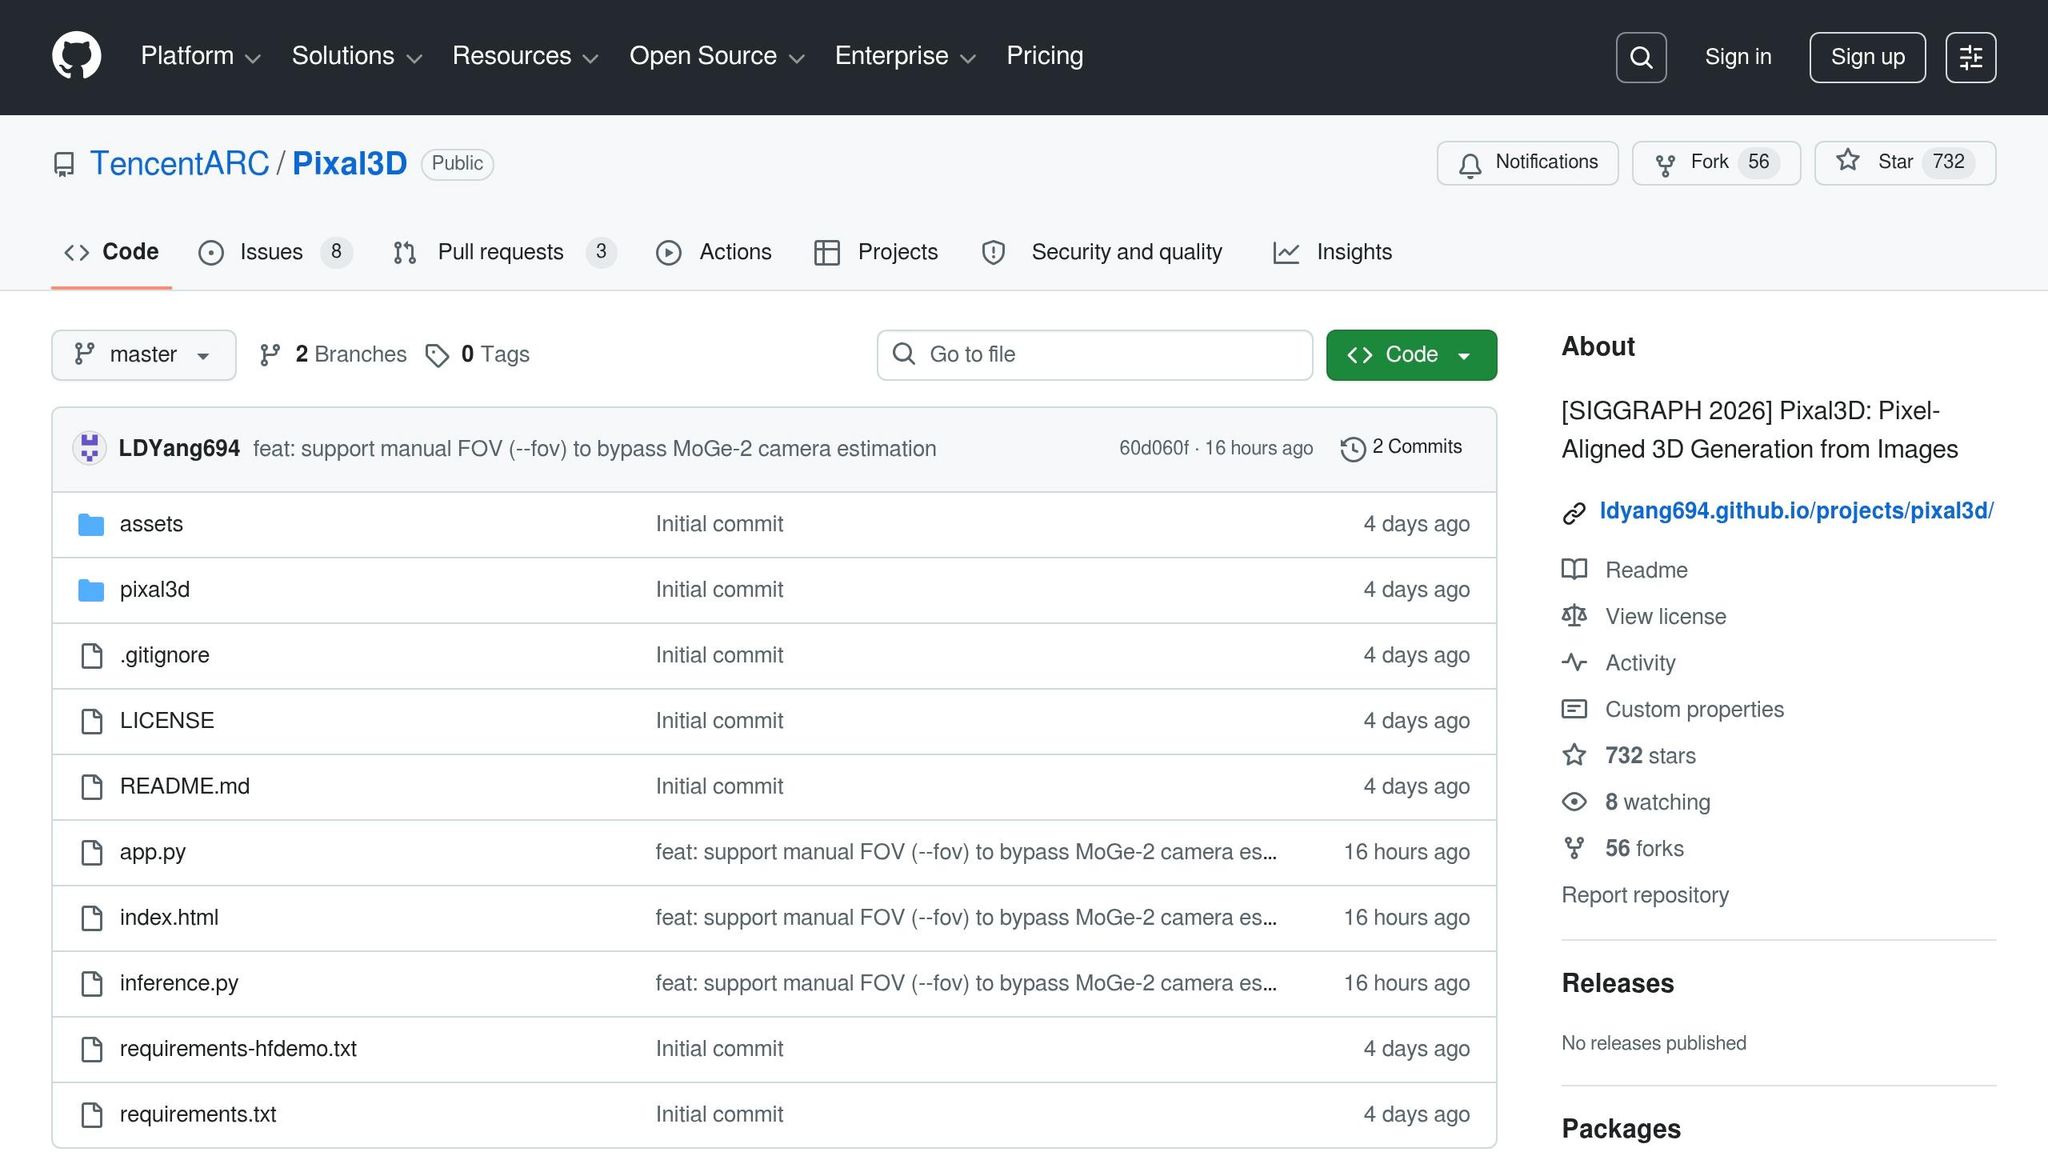
Pixal3D offers three ways to get started. First, you can use the free Gradio demo hosted on Hugging Face Spaces. This option lets you upload an image and receive a .glb file in return, with no GPU or installation needed. Second, for complete control, you can clone the GitHub repository at TencentARC/Pixal3D. Lastly, if you are integrating Pixal3D into an existing inference workflow, you can manually download the model weights from Hugging Face.
For production use, stick with the main branch (TRELLIS.2). If you are replicating SIGGRAPH 2026 benchmark results, switch to the paper branch. Earlier sections of this guide explain the differences between the branches in detail.
Once you have decided on an access route, make sure your system meets the necessary prerequisites for local installation.
System Requirements
Pixal3D is designed for Linux systems, with Ubuntu 22.04 serving as the baseline for testing. You will need Python 3.10 or 3.12, CUDA 12.4 (or 13.0 if you are using Blackwell-architecture GPUs like the RTX PRO 6000), and an NVIDIA GPU with at least 16 GB of VRAM. Additionally, the project relies on torchsparse and FlashAttention 3, both of which have specific CUDA build requirements.
One key note: the requirements-hfdemo.txt file is optimized for H-series GPUs (H100/H200) and Blackwell architectures. Using this file on non-Blackwell GPUs could cause compatibility issues, so proceed with caution.
Installation and Basic Configuration
Once your hardware checks out, follow these steps to set up Pixal3D locally.
For the main branch, start by installing the TRELLIS.2 base environment as outlined in its guide. Then, proceed with the following:
Add the utils3d wheel (v0.0.2):
pip install https://github.com/LDYang694/Storages/releases/download/20260430/utils3d-0.0.2-py3-none-any.whl
Install Pixal3D's dependencies:
pip install -r requirements.txt
For the paper branch, the setup process differs slightly:
- Install PyTorch 2.5.1 along with torchvision 0.20.1.
- Build
torchsparsemanually from themit-han-lab/torchsparserepository.
Install the local voxelize utility:
pip install third_party/voxelize
It is recommended to use a dedicated Conda environment for Pixal3D. This prevents conflicts with other projects, especially since dependencies like google-sparsehash can interfere if installed in a shared environment.
After installing the dependencies, you are ready to run Pixal3D. Use python inference.py for generating a .glb file from a single image, or launch a local Gradio interface with python app.py. For guidance on input formatting, check the sample images in the assets/test_image/ folder, which demonstrate the clean, centered silhouette style discussed earlier in this guide.
New Local 3D AI Generator Is Pixel-Perfect: Pixal3D (Open Weights)
Using Pixal3D on Real Projects
This section shifts from the technical setup to how Pixal3D performs in actual workflows.
Working with the Hugging Face Demo

The Hugging Face Space at TencentARC/Pixal3D operates on ZeroGPU with RTX PRO 6000 (Blackwell, CUDA 13.0). To get started, upload your image in the "Upload Reference" section and fine-tune parameters like VIEW_ANGLE (default 0 degrees), FOV, and Dist to align with your source camera. These adjustments are critical for accurately calibrating the back-projection geometry, so matching these settings to your camera's specifics is a must.
Once the model is generated, use the interactive viewer to rotate and inspect it. Pay close attention to ensure the silhouette aligns with your source image, the back side has a continuous surface (as inferred by the model), and there are no disconnected mesh fragments ('floaters') near thin or transparent areas. If you notice issues, tweak your input image and try again. This demo complements the local setup process discussed earlier.
"The main issue is that our Space depends on FlashAttention 3, which is closely tied to the GPU backend." (Dong-Yang Li, Project Lead)
If you run into a queue error, running the demo locally with python app.py can save time and avoid delays.
Preparing Input Images for Best Results
To achieve optimal results, use high-quality, centered images with plain backgrounds. Front or three-quarter views work best, as they provide reliable depth and proportion information. Profile shots, however, leave too much geometry to be guessed by the model.
Lighting is another critical factor. Even, neutral lighting prevents baked shadows and highlights from distorting the PBR maps. For instance, a bright patch caused by studio lighting in your roughness map could become a permanent artifact in the texture. Similarly, glare on the metallic channel might mislead the model into incorrectly interpreting a surface's material properties. Aim for an image readiness score of at least 75/100 before allocating GPU resources.
Certain materials (like transparent glass, mirrored metal, hair, wires, and very thin structures) often result in unreliable geometry. This limitation is not specific to Pixal3D; it is a challenge for any single-image reconstruction method.
Exporting and Using 3D Models
Pixal3D generates a GLB file complete with PBR maps. While GLB is convenient for quick previews and Three.js scenes, it is not the best choice for detailed work in digital content creation (DCC) tools or game engines.
| Target Use Case | Recommended Format | Primary Tool |
|---|---|---|
| Web preview / quick review | GLB | WebGL, Windows 3D Viewer |
| Mesh editing and cleanup | OBJ | Blender |
| Game development | FBX | Unity, Unreal Engine |
| 3D printing | STL / 3MF | Cura, PrusaSlicer (after repair) |
"GLB output is a draft; further refinement is recommended." (Pixal3D Official Site)
For cleanup, import the OBJ file into Blender to fix issues like incorrect normals. If you are working with game engines, export the cleaned model as an FBX file to maintain material structures. For real-time engines, consider running a decimation pass to reduce the poly count, as the raw mesh is often too dense for optimal performance. If you are prepping for 3D printing, make sure the model is watertight before exporting to STL, as AI-generated geometry often contains gaps. These steps help integrate Pixal3D models into a range of workflows.
For those looking to process images in bulk or integrate Pixal3D into a CI pipeline, skip the web demo entirely by running this command locally:
python inference.py --image ./assets/test_image/your_object.png --output ./output.glb
This approach automates batch processing and helps with overall throughput.
Advanced Workflows and Customization
Multi-View and Camera-Aware Setups
Pixal3D defaults to single-view generation, but that is far from its limits. By using the back-projection conditioner, the system can handle multi-view inputs. It works by projecting features from multiple images into a shared 3D feature volume and then averaging them. This approach helps resolve ambiguities in occluded areas (like the back of a chair or the underside of a car) that a single front-facing image would struggle to interpret.
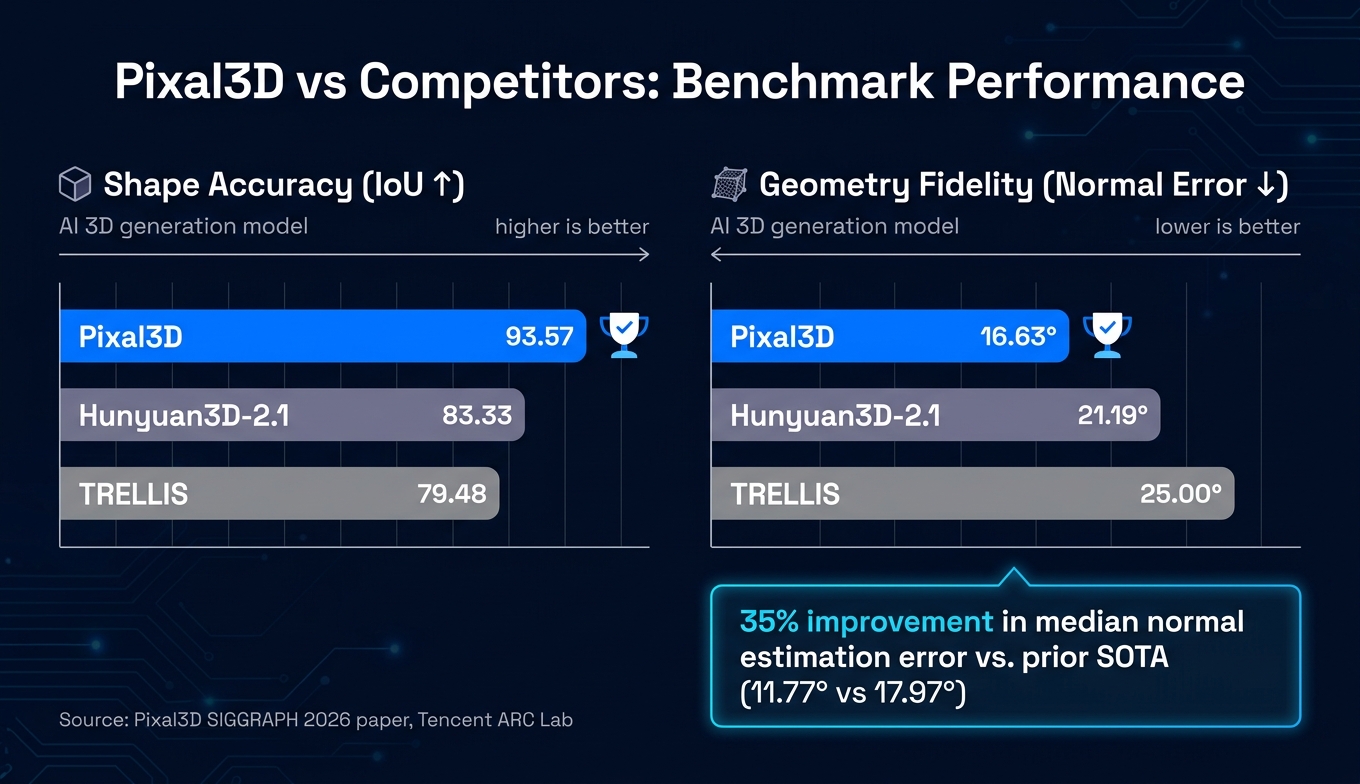
Camera parameters play a crucial role in this setup. Intrinsics, distance, and cube scale define the camera's frustum, turning correspondence into a reliable geometric process rather than a probabilistic one. If you are working with controlled capture rigs or photogrammetry sessions where camera data is already known, passing those values explicitly makes a noticeable difference. The improvement is quantifiable: Pixal3D achieves a median normal estimation error of 11.77 degrees, outperforming the prior state-of-the-art figure of 17.97 degrees by roughly 35%. This advantage becomes even more pronounced when accurate camera parameters are provided.
"This alignment turns correspondence from a learned, stochastic behavior into a solid geometric prior." (Dong-Yang Li et al., Tencent ARC Lab)
This multi-view approach fits naturally into automated workflows, setting the stage for efficient development pipelines.
Adding Pixal3D to Development Pipelines
Automating workflows with Pixal3D starts with the inference.py script, which serves as the main entry point. It scales effectively for batch processing and can be integrated into CI pipelines. For CI, you will need a GPU-enabled runner or a dedicated inference node.
For larger-scale production needs where managing GPU infrastructure is not ideal, third-party services like fal.ai offer Pixal3D as an API. This shifts the burden of infrastructure management to the provider, making it a practical option for workloads that are sporadic or hard to predict.
Handling complex scenes with multiple objects and real-world backgrounds requires a more robust setup. The recommended workflow combines three tools: SAM3 for segmenting individual objects, Qwen-image-edit for completing occluded areas before generation, and MoGe for aligning depth across objects to ensure accurate relative scaling. This approach avoids the common failure point of estimating 7-DoF object poses, which tends to derail multi-object pipelines.
| Integration Step | Tool | Purpose |
|---|---|---|
| Segmentation | SAM3 | Isolate individual objects from scene images |
| Occlusion completion | Qwen-image-edit | Fill hidden regions before 3D generation |
| 3D generation | Pixal3D | Create pixel-aligned geometry and PBR textures |
| Depth alignment | MoGe | Resolve relative scale in multi-object scenes |
With these tools working together, the pipeline becomes more reliable and adaptable to advanced workflows.
Extending and Customizing Pixal3D
Pixal3D's modular architecture provides flexibility for domain-specific customizations. The system is split into three components: a VAE for sparse SDF latents, the back-projection conditioner, and a two-stage generator. This design allows you to fine-tune or replace individual parts without retraining the entire system.
If your use case involves specialized geometry (industrial equipment, medical devices, or stylized characters) the back-projection conditioner is the most impactful component to modify. It handles the pixel-to-3D mapping, making it critical for adapting to unique datasets. However, there is a key dependency to watch out for: you must install utils3d from the specific 2026 release link provided in the documentation. Using the PyPI version will cause the back-projection features to fail silently.
This modularity ensures that Pixal3D can be tailored to meet a wide range of specialized requirements while maintaining its core functionality.
Troubleshooting and Optimization
Getting Pixal3D to work effectively depends on careful setup and high-quality inputs.
Common Errors and Fixes
Most issues with Pixal3D fall into two categories: setup problems in the environment or poor input quality during runtime. Fixing these requires different approaches.
For environment-related issues, one common mistake is skipping the installation of TRELLIS.2. Pixal3D depends on TRELLIS.2 being installed first. Without it, the software will not function. If you are using an H-series GPU, stick to requirements-hfdemo.txt for dependencies. Additionally, install utils3d from the specific wheel provided in the repository, not from PyPI.
If you are experiencing delays with the Hugging Face demo due to queuing, running app.py locally is a reliable alternative.
At runtime, errors like "wrong shape" or poor rear geometry often stem from bad input images. Ideal inputs should feature a centered subject with a clean silhouette. Cropped edges, cluttered backgrounds, or subjects blending into their surroundings force the model to guess missing details. For persistent rear geometry issues, switch to multi-view inputs rather than tweaking parameters.
| Problem | Likely Cause | Fix |
|---|---|---|
| Demo never loads | Hugging Face Space is sleeping or at capacity | Run app.py locally or retry after some time |
| Wrong/distorted shape | Cropped silhouette or background interference | Use a centered subject with a clear, high-contrast silhouette |
| Inaccurate rear geometry | Single-view input causing hidden geometry issues | Provide front, side, and back images |
| Bad PBR/material | Harsh or uneven lighting in the input image | Use neutral, even lighting and refine materials in post-processing |
| Installation errors | Missing TRELLIS.2 or wrong requirements file | Install TRELLIS.2 first and use requirements.txt for local setups |
| Inference failure | MoGe-2 camera estimation error | Pass --fov manually to skip auto-estimation |
Performance Optimization
Once you have resolved errors, fine-tuning the parameters can improve results and efficiency.
For production work, use the main branch, which runs on the TRELLIS.2 backbone. The paper branch, while useful for replicating SIGGRAPH 2026 benchmarks, is not optimized for real-world asset creation.
Two key parameters for tuning are ss_guidance_strength and slat_guidance_strength. For rigid objects like furniture or vehicles, set ss_guidance_strength between 8.0 and 9.0 for precise silhouette adherence. For organic shapes, lower it to 5.0 to 7.0 for smoother results. If surface details appear too soft, increase slat_guidance_strength from the default 3.0 to around 4.0 to 5.0.
For web or real-time applications, adjust mesh_simplify and texture_size to balance performance and quality. Lowering mesh_simplify to 0.85 to 0.90 reduces polygon count, while increasing texture_size to 2048 enhances texture clarity. After exporting the model as a GLB, use Blender to decimate the mesh further and validate the file before deployment.
If scaling issues or inference failures persist, the --fov flag can quickly diagnose the problem. By manually setting the field-of-view, you bypass MoGe-2's camera estimation, which is a frequent source of miscalibration, without disrupting the rest of the pipeline.
Final Thoughts on Pixal3D
Pixal3D vs TRELLIS vs Hunyuan3D-2.1: 3D Model Quality Benchmarks
On the Toys4K dataset, Pixal3D delivers an IoU of 93.57, outperforming TRELLIS at 79.48 and Hunyuan3D-2.1 at 83.33. This leap in performance is credited to its use of explicit back-projection. In terms of geometry fidelity, the model achieves a mean normal error of 16.63, better than TRELLIS's 25.00 and Hunyuan3D-2.1's 21.19.
From a technical perspective, Pixal3D stands out with its backbone-agnostic design. Tested on both Direct3D-S2 and Trellis.2, it shows adaptability, offering a conditioning scheme that fits cleanly into diverse asset pipelines.
The authors encapsulate the model's contribution succinctly:
"Pixal3D for the first time demonstrates 3D-native pixel-aligned generation at scale, and provides a new inspiring way towards high-fidelity 3D generation of object or scene from single or multi-view images." (Dong-Yang Li et al.)
That said, there are practical limitations. Running Pixal3D locally demands a high-end GPU like the H200 or RTX PRO 6000, along with CUDA 13.0 and PyTorch 2.8.0+ to support FlashAttention 3. While the Hugging Face demo reduces the entry barrier, ZeroGPU queue times can be inconsistent during peak periods.
FAQs
What kinds of photos work best with Pixal3D?
For Pixal3D to perform at its best, start with high-quality, well-lit images of a single object with a clean silhouette, centered framing, and neutral even lighting. Front or three-quarter views work better than profile shots. Avoid watermarks, heavy shadows, strong highlights, transparent materials, hair, and very thin structures, which all degrade PBR estimation.
Can I use Pixal3D without a high-end NVIDIA GPU?
Yes via the free Hugging Face Space, which runs on ZeroGPU with an RTX PRO 6000. For local installation you need an NVIDIA GPU with at least 16 GB VRAM, CUDA 12.4 (or 13.0 for Blackwell cards), and PyTorch 2.8.0+ to support FlashAttention 3. The requirements-hfdemo.txt file is tuned for H-series and Blackwell GPUs and may not work on older architectures.
How do I prepare a Pixal3D GLB for Unity, Unreal, or 3D printing?
For Unity or Unreal, import the GLB into Blender, fix normals, decimate the mesh to reduce poly count, then export as FBX to preserve PBR materials. For 3D printing, run a watertight check in Blender or MeshLab to close any gaps in the AI-generated geometry, then export as STL or 3MF and slice in Cura or PrusaSlicer.
How does Pixal3D compare to TRELLIS and Hunyuan3D-2.1?
On the Toys4K benchmark, Pixal3D scores 93.57 IoU vs 79.48 for TRELLIS and 83.33 for Hunyuan3D-2.1. Median normal estimation error is 11.77 degrees vs the prior state-of-the-art 17.97 degrees, roughly a 35% improvement. The gain comes from explicit pixel-to-voxel back-projection rather than indirect cross-attention.
Comments